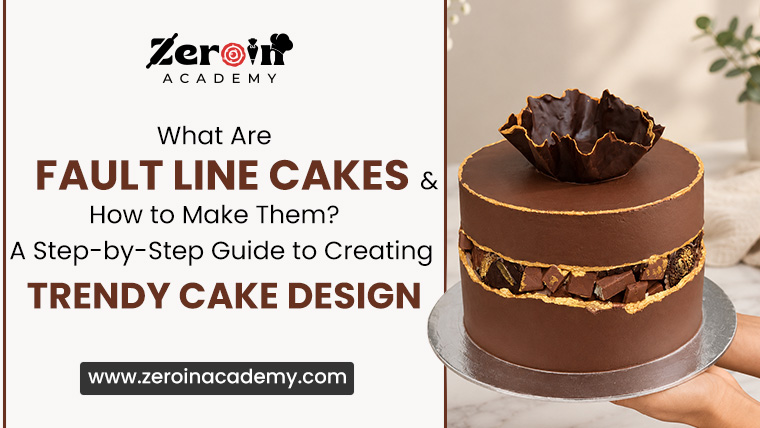
A fault line cake is a layered cake with a horizontal gap cut into the frosting and filled with a contrasting decoration such as sprinkles, macarons, berries or chocolate shards. The design depends on five controllable factors: evenly baked layers, a buttercream that holds its shape, a chilled crumb coat, a fault band of 2 to 3 cm, and a filling that stays dry against the frosting. This guide covers each factor in the order you work through them, along with the quantities for an 8-inch cake, the mistakes that cause sagging bands and bleeding colours, and the adjustments that Chennai’s heat and humidity require.
Zero In Academy teaches this technique in our Bakery Classes In Chennai, and the method below follows the same sequence our trainers demonstrate in the kitchen. The sections ahead define the design first and then move through the process one stage at a time.
What Is a Fault Line Cake?
A fault line cake carries a horizontal band cut into its frosting, and that band holds a decorative filling. The name comes from geology, where a fault line marks a break between rock layers. The upper and lower sections of the cake receive a smooth coat of buttercream, while the middle band carries the colour and texture.
Bakers fill the band with sprinkles, fresh fruit, macarons, chocolate shards, edible flowers or gold leaf. A cake with four layers gives the band enough height above and below to look balanced. Customers order the design for birthdays, engagement parties and anniversaries because the band can match any colour theme or flavour pairing.
Tools and Ingredients You Need
The quantities below produce two 8-inch layers of vanilla sponge. Prepare the sponge batch twice to build a four-layer cake. The buttercream quantities cover one four-layer cake.
- Unsalted butter (sponge): 225 g, for tenderness and flavour.
- Caster sugar: 225 g, for sweetness and structure.
- Eggs: 4 large, for lift and binding.
- All-purpose flour: 225 g with 2 tsp baking powder, for crumb structure.
- Milk and vanilla extract (sponge): 3 tbsp and 2 tsp, for moisture and flavour.
- Unsalted butter (buttercream): 400 g, as the frosting base.
- Icing sugar: 800 g, for frosting body.
- Milk and vanilla extract (buttercream): 1 to 2 tbsp and 1 tsp, to loosen the frosting and add flavour.
- Offset spatula, bench scraper and turntable: 1 each, for smooth coating.
- Ruler and small paring knife: 1 each, for measuring and cutting the band.
- Cake dowel: 1, to support the stack.
Step-by-Step Method for Making a Fault Line Cake
Step 1: Bake and Level the Layers
Bake each batch at 170°C for 25 to 30 minutes, until a skewer comes out clean. Cool the layers on a wire rack for at least one hour. Warm sponge melts buttercream and causes layers to slide. Trim the domes with a serrated knife so every layer sits flat.
Step 2: Prepare the Buttercream
Beat the butter for five minutes until pale, then add the icing sugar in three batches. Finish with one to two tablespoons of milk and a teaspoon of vanilla. The buttercream should hold a soft peak and still spread without tearing the sponge. In Chennai’s humidity, chill the bowl for 15 minutes whenever the mixture turns glossy.
Step 3: Stack the Layers and Apply the Crumb Coat
Place the first layer on a cake board and spread about 1 cm of buttercream over it. Repeat with the remaining layers and press the top layer down gently. Spread a thin layer of buttercream over the top and sides and scrape it back until the sponge shows faintly through. Chill the cake for 30 minutes. Crumbs left unsealed at this stage turn up in the final coat and become visible along the cut edge of the band.
Step 4: Apply the Final Coat
Cover the cake with a second, thicker layer of buttercream and smooth the sides with a bench scraper held at a steady angle. Smooth the top with the offset spatula. Chill for 20 minutes. Cold buttercream cuts cleanly in the next step, while soft buttercream tears.
Step 5: Mark and Cut the Fault Band
Mark the band on the chilled cake before cutting anything. For an 8-inch cake with four layers, measure 2.5 cm and place the band slightly above the halfway line, since a band at the exact centre looks rigid. Make small marks at four points around the cake, then score a line through each pair by holding the knife still and turning the turntable. Cut about 1 cm deep, lift out the buttercream between the lines with the spatula and wipe the knife after every pass. The recessed band should have the same depth all the way round.
Step 6: Fill the Band and Decorate
Pipe a thin line of buttercream or ganache into the recess. This layer holds the decoration in place and blocks moisture from reaching the sponge. Press in sprinkles, macarons, berries or chocolate shards, starting at the bottom edge of the band. Chill the finished cake for 30 minutes before boxing.
Decoration Ideas for the Fault Line
- Sprinkles: Nonpareils release colour into moist frosting, so apply them last and press them in dry.
- Macarons: Place them over a thick base of buttercream, since their weight can pull a thin base down.
- Fresh berries: Dry them fully and add them close to serving time to prevent juice from staining the frosting.
- Chocolate shards: Pair them with chocolate or coffee sponge and set them upright into ganache.
Common Mistakes and How to Fix Them
Most failures with this design trace back to temperature, moisture or support.
- Ragged band edges: The buttercream was too soft during cutting. Chill the cake for 20 minutes and wipe the knife after each pass.
- Sagging filling: A heavy decoration sat on a thin base. Pipe a thicker base and chill it before adding macarons.
- Colour bleeding: Wet sprinkles or fruit released moisture into the frosting. Use a ganache base and decorate close to serving.
- Sliding layers: The sponge was warm or the stack had no support. Cool the layers fully and insert a central dowel through the stack.
How Zero In Academy Teaches Fault Line Cakes
At Zero In Academy, we teach the technique in a fixed sequence so that each stage builds on the one before it. Students bake and level their own layers, which shows them how crumb structure affects the final finish. Our trainers demonstrate the crumb coat, scraper angle and band cutting at the table, and students then repeat each stage on their own cake.
Our sessions also cover:
- Buttercream consistency at room temperatures above 30°C
- Boxing, transport and storage of finished cakes
A fault line cake succeeds when the layers are level, the buttercream is firm, the band is cut cleanly and the filling is dry. Each of those points can be checked at its own stage, which makes the design repeatable once the sequence becomes routine.You can practise the full technique under trainer supervision in our Baking Classes In Chennai Velachery at Zero In Academy.